
As a kid, I got all giddy showing up at a restaurant knowing there was an Andes mint waiting for me upon exti. Just a little hint of chocolate and mint married together in one little treat is such a cute and refreshing end to a dinner out.
This nostalgia inspired me to make these soft and chewy Andes Mint Cookies. This is one of those things that will define me as “old”, I am sure of it. Regardless, some folks might prefer to call them grasshopper cookies, simply mint chocolate cookies and some foodie friends have even said they taste just like the Crumbl cookie.
Chocolate Mint Cookies
I’m not even sure if there are lots of places out there still offering Andes mints after a meal, but if there aren’t, there should be. A big rounded glass full of mints was the sign of a solid restaurant at one point.
I love these minty cookies because they combine rich chocolatey goodness with the refreshing zip of mint. There’s little that can compete with this kind of delicious and decadent dessert that also packs a fresh zestiness. My favorite candy in cookie form.
Why You’ll Love Andes Mint Cookies
They’ve also been made famous at Crumbl, the fastest growing cookie store ever, so you know they will be a huge hit at your next gathering or party.
I’m not sure why I am trying to convince you to love mint chocolate chip cookies, but here are a few reasons:
- Fast– the prep time on these is only 15 minutes and while they cookies are baking you can easily and quickly whip up the icing.
- Refreshing– who doesn’t love a decadent dessert that’s also zesty? These minty bites of chocolatey goodness are the perfect end to any meal.
- Portable– you can make these cookies so quickly and then pack them up to take to a party. They travel well and are a great addition to any table.
- Huge Hit– They are great year round, but what better time to serve a peppermint cookie than during the Christmas season? Add these to your cookie tray right alongside candy canes for the most festive display!
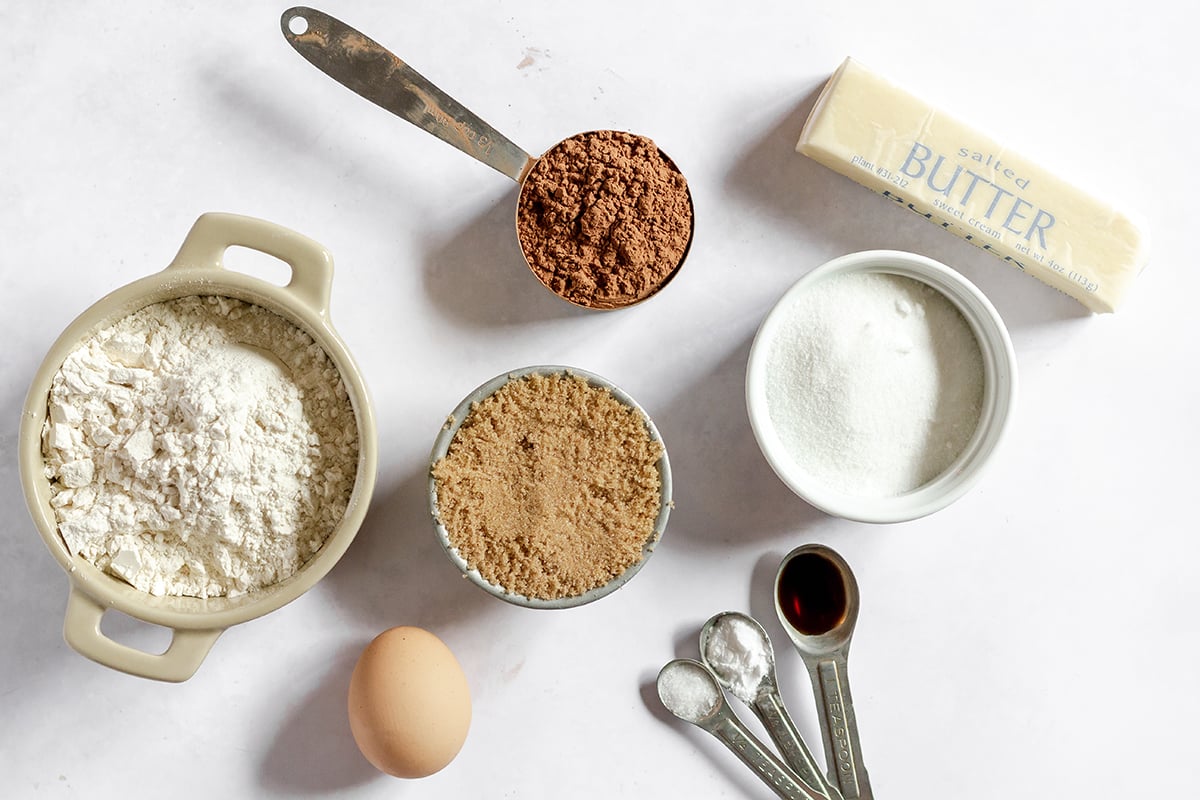
Ingredients
This ingredient list is a little beyond kitchen staples… unless Andes mint chips are part of your pantry staples and then I envy you. But they can all easily be found at the grocery store.
- Unsalted Butter– make sure to use unsalted butter and soften it on the counter for about an hour prior to baking. You’ll use this in the cookies and the frosting.
- Brown sugar– you can use light or brown sugar- the latter will produce a sweeter result.
- White sugar– you probably have this in your pantry, but feel free to grab any brand you prefer.
- Egg– typically baking recipes require a large egg, so check that your regular eggs are about this size.
- Vanilla extract– this is often a pantry staple, but if you don’t have it vanilla extract is easy to make.
- Flour– just grab your general all-purpose flour for this – avoid self-rising.
- Unsweetened Cocoa powder– this ingredient will lend all of the flavor of chocolate without any extra sweetener.
- Baking soda– be sure to use baking soda instead of baking powder. This leavening agent will make your cookies scrumptious.
- Fine sea salt– make sure to use a good salt. Since there’s only a bit in the recipe, you want to make it a good one to bring out the flavors of the other ingredients. If using salted butter, omit this salt.
- Powdered sugar- this silky, fine sugar is perfect for making icing. It’s also called confectioner’s sugar.
- Peppermint extract– this ingredient is going to give your cookies that flavor to replicate Andes mints. Don’t skimp on this ingredient. You can use it later to infuse into ice cream, other baked goods, or coffee.
- Green food coloring– while this ingredient is optional, it really does elevate this icing and make the connection that “hey, these are peppermint flavored!”
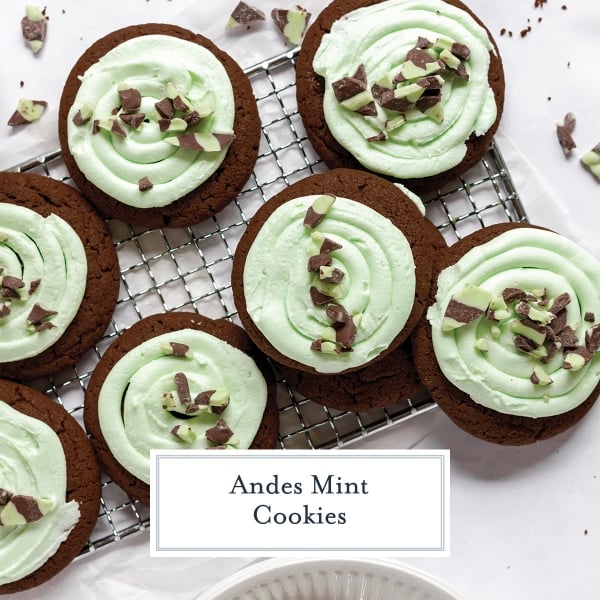
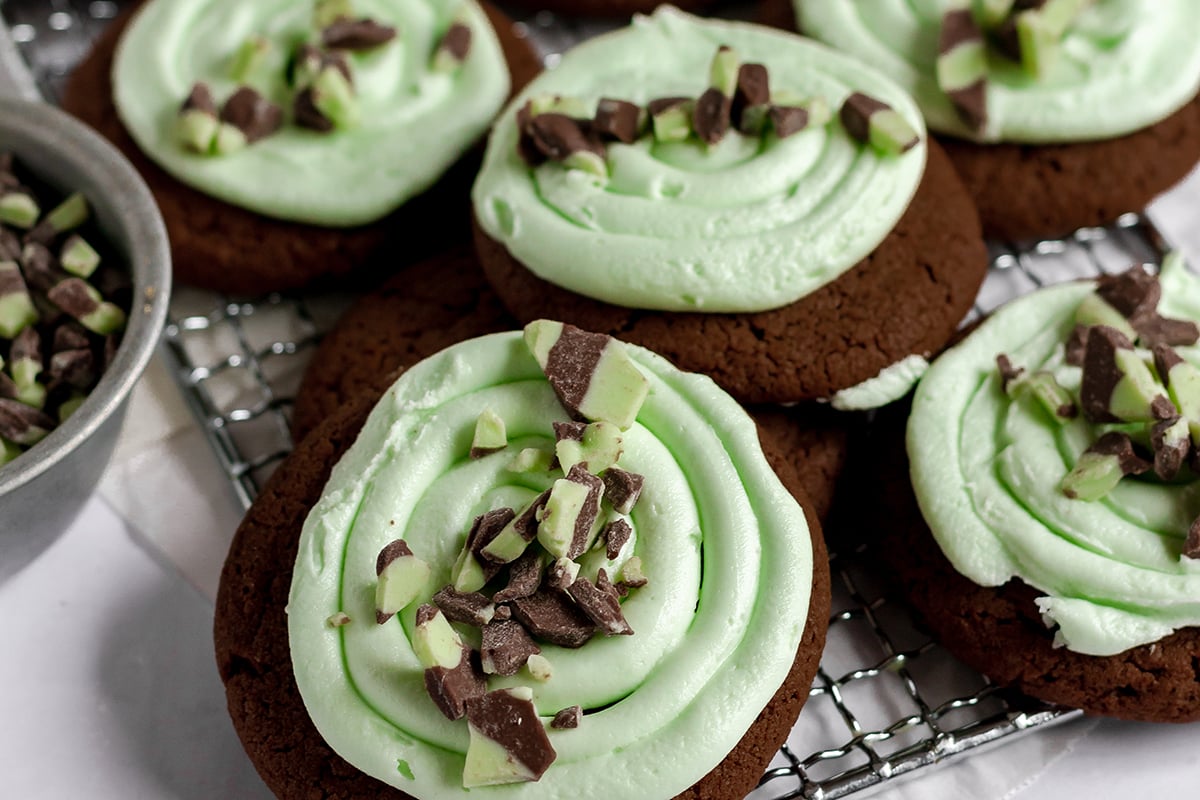
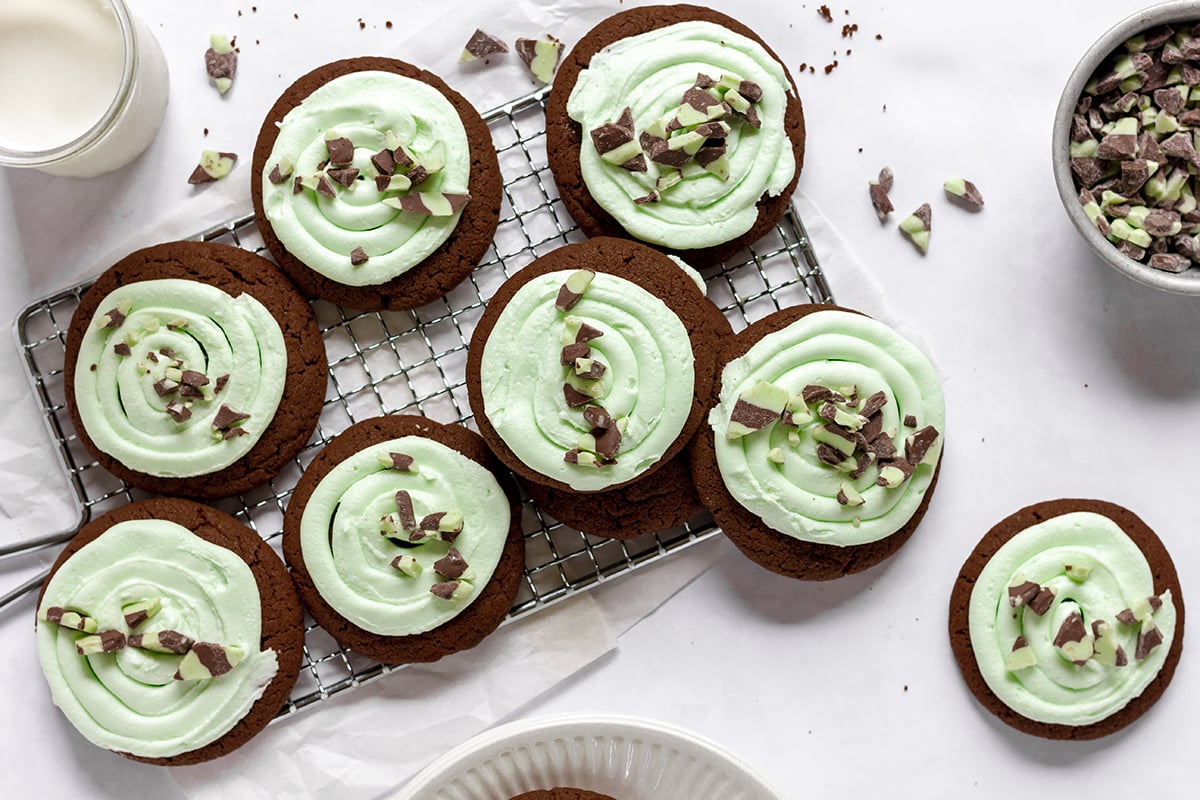
- Andes mint chips- another optional ingredient, they add the special touch to the top of the cookie. Grab them at grocery stores or online or feel free to make your own by chopping up full size Andes bars. Or just use mini chocolate chips or chopped dark chocolate. If you see other bags marked creme de menthe- these are them as well.
How To Make Andes Mint Cookies
These cookies are super easy to make and the dough doesn’t require any chilling. the hardest part will be letting them cool until they are ready to be frosted.
- Prepare oven and baking sheet. Preheat the oven and line a baking sheet with parchment paper.
- Dry ingredients. In a medium bowl, sift or whisk together the dry ingredients so they are evenly distributed.
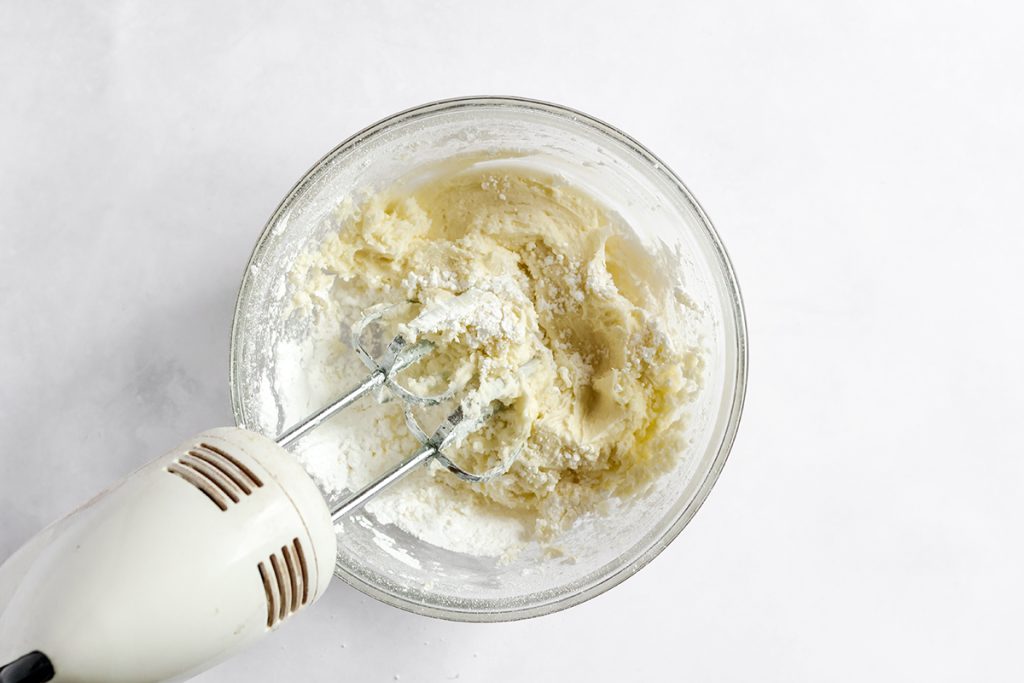
- Beat butter and sugars. Beat the butter and sugars, until light and fluffy. This introduces air into the mixture to make them light and fluffy.
- Combine wet and dry ingredients. Add the egg and vanilla, continuing to mix well until no streaks remain. Add the dry ingredients to the wet ingredients, but only mix until just combined.
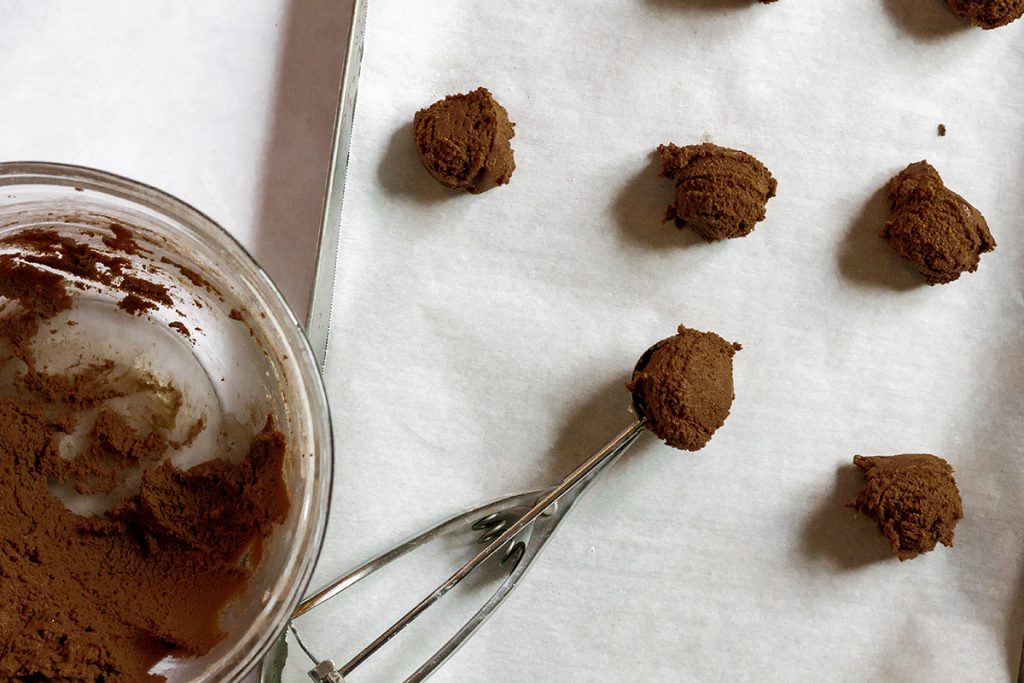
- Scoop dough. Use a large spoon, a melon baller, or cookie scoop to measure out the andes mint cookies before rolling the cookie dough into balls.
- Add to baking sheet and flatten. Drop the dough balls onto the prepared baking sheet and slightly flatten using your palm, bottom of a well floured glass or the back of a spoon.
- Bake. Bake until golden brown and then remove. Allow cookies to cool slightly before transferring to a wire rack to finish cooling.
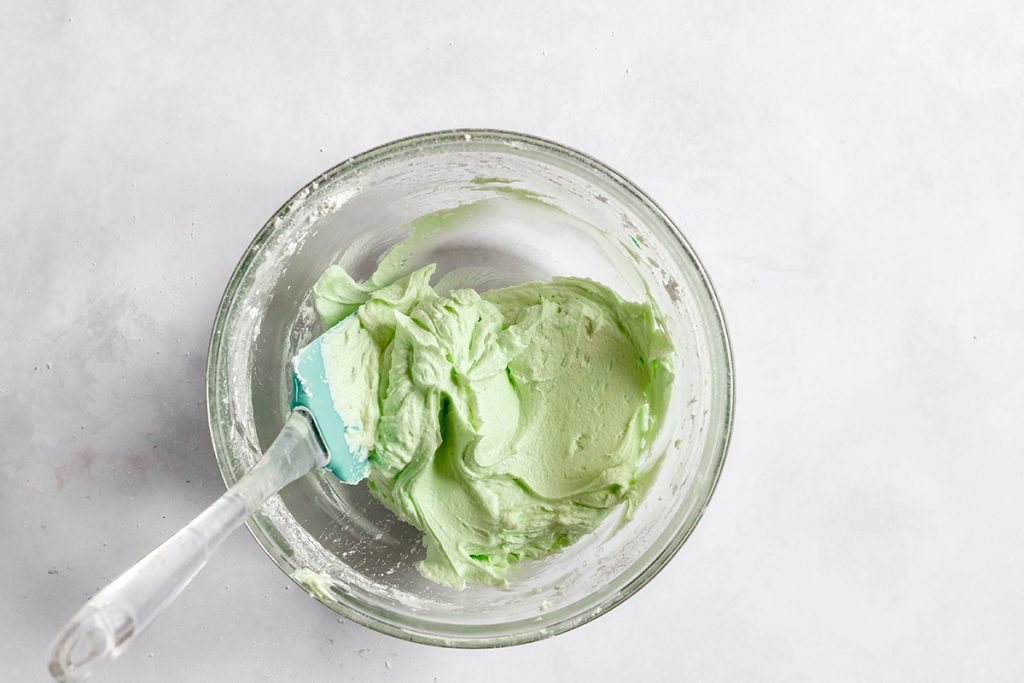
- Make icing. Make the icing by beating together all of the frosting ingredients in a bowl until light and fluffy. The green food coloring is optional.
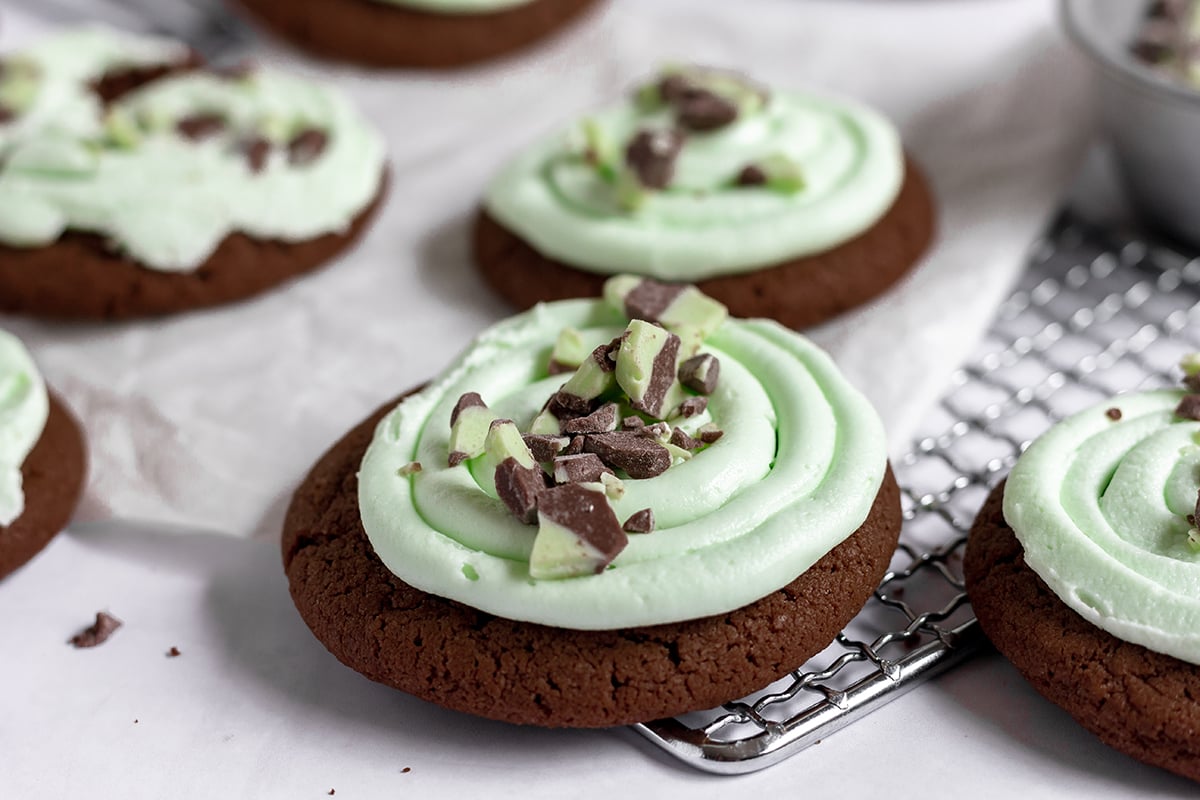
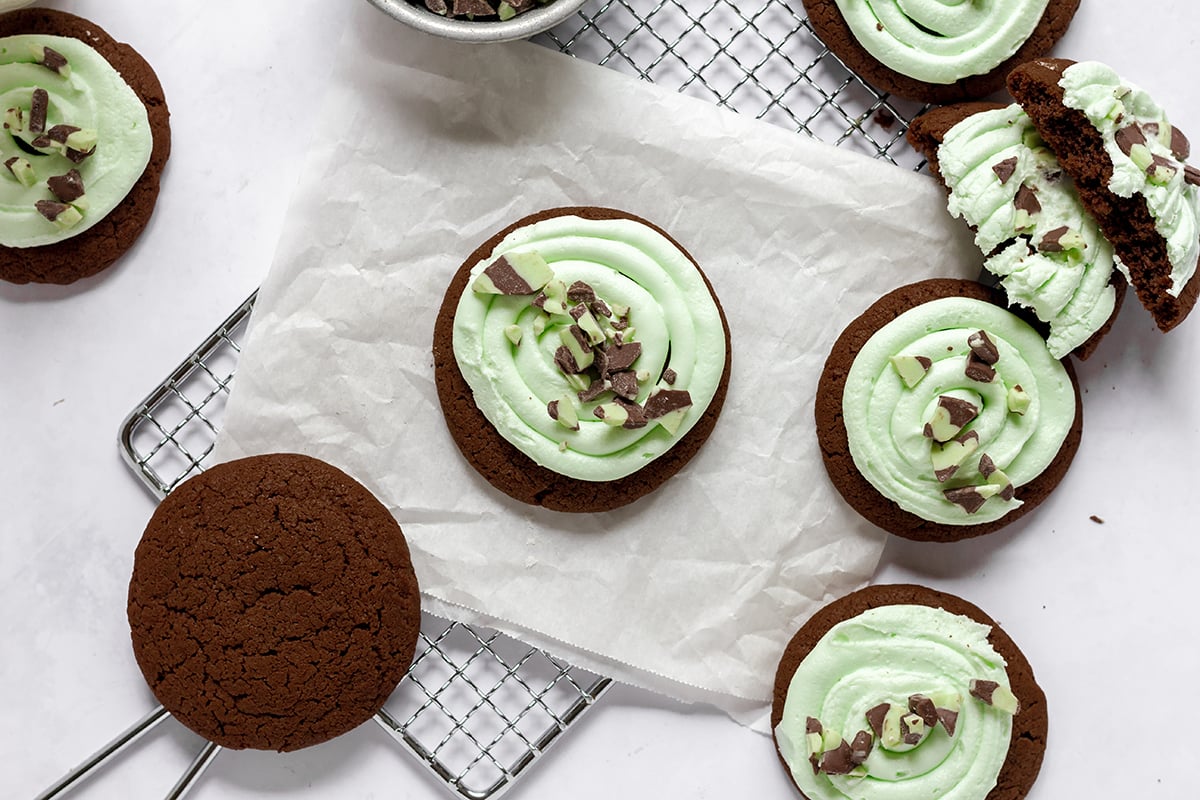
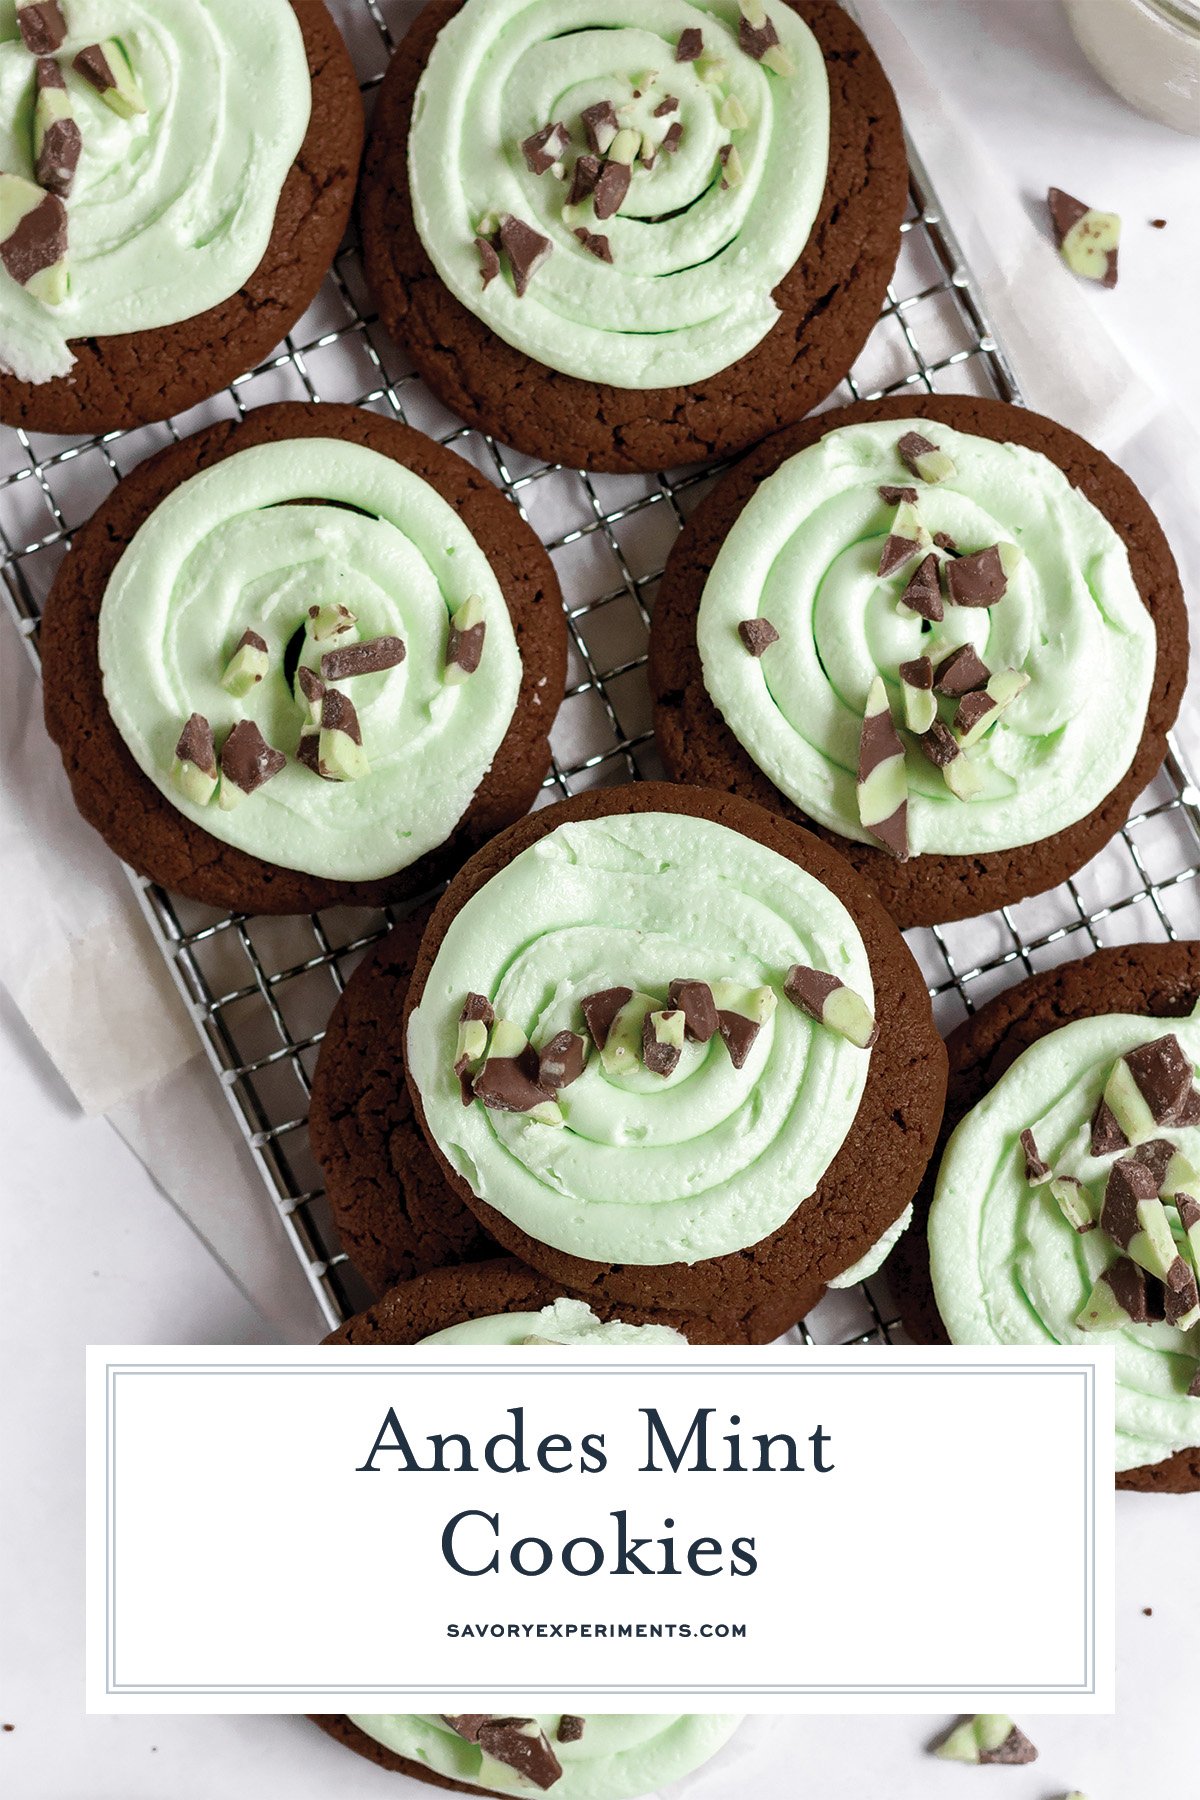
- Ice cookies. Ice the cookies starting in the center. Work your way to the edges in circular motion.
- Top with Andes chips. Sprinkle the cookies with Andes chips or mini chocolate chips.
Andes Mint Cookies Variations
There are plenty of ways that you can make these chewy cookies your new favorite cookies.
- Nuts– chop any nuts you prefer and add them in for some crunch and saltiness.
- Marshmallows– get some of the tiniest marshmallows and add them in or press on top. Or use small marshmallows and cut them into quarters with kitchen shears.
- Chocolate chips– press mini chocolate chips into the top as the andes mint cookies cool or stir in 1/2 cup to the chocolate cookie dough.
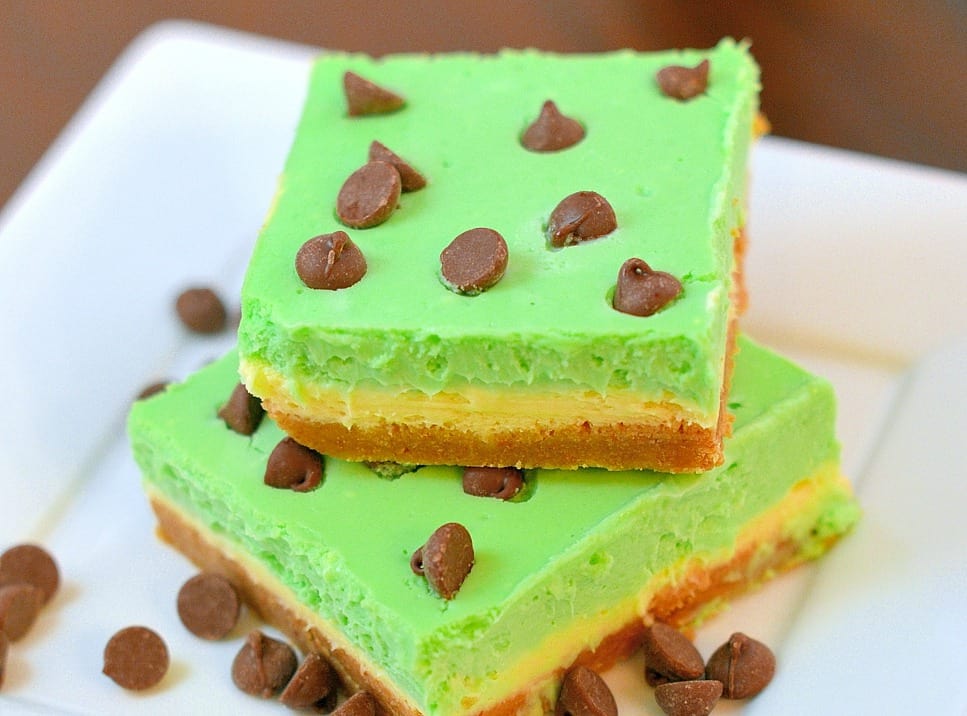
- Thin Mints- To top, you can also use Thin Mint Girl Scout Cookies or most stores have their own version of the minty wafer. We love using them in our Thin Mint Cheesecake Bars– cheesecake mint brownies!
- Espresso Powder- Coffee and espresso can bring out the natural deliciousness in chocolate, but they also contain caffeine, something my little kids don’t need. If you do want to add it, just a 1/2 teaspoon of espresso powder or 1 tablespoon of strongly brewed coffee will do the trick.
- Drizzle It- Want to take this delicious Andes mint cookie recipe to yet another level? Melt milk or dark chocolate or use a powdered sugar glaze and drizzle it over the frosting and chopped candy.
Storage & Freezing
Storage: These chewy chocolate cookies can be stored in an airtight container in a cool dry place or covered with plastic wrap on a plate for up to a week. Separate cookies using parchment or wax paper to prevent sticking. Cookies are, of course, best enjoyed without the first 2 days of baking.
Freezing: Andes Mint Cookies can also be frozen. Wrap cookies in freezer paper and place in an airtight container or freezer bag, being mindful to push out as much air as possible, and seal. Freeze for up to 6 months, thawing on the counter at room temperature.
So make a double batch of cookies and freeze them! It only takes a couple of minutes for a cookie to defrost, so you can take them out one at a time when you really want one.
Frequently Asked Questions
The mint flavor in these chocolate mint cookies is peppermint flavor. The mints have layers of peppermint and chocolate.
These mints melt easily in the microwave. You shouldn’t need to melt them for this recipe, unless you want to drizzle melted chocolate on top.
Yes, Andes candies are real chocolate. They are made with either semi-sweet or milk chocolate.

More Cookie Recipes
Even more delicious cookie recipes (and one cheesecake bar)…
Grasshopper Cheesecake Bars

Cheesecake Cookie Recipe

Kitchen Sink Cookies
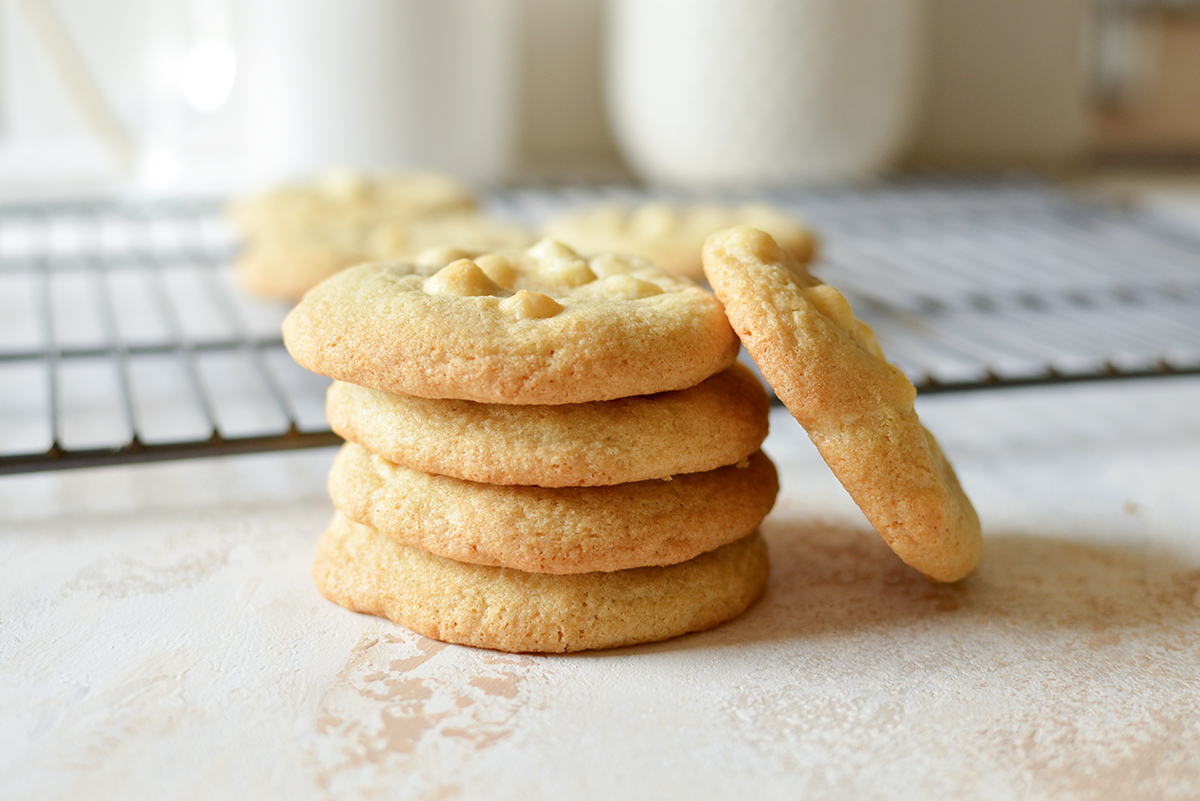
White Chocolate Chip Cookie Recipe
And if baked cookies aren’t your jam, opt for our famous edible cookie dough or make baked cookies into cookie butter.
Andes Mint Cookie Recipe
Equipment
Ingredients
For the cookies:
- ½ cup unsalted butter , softened
- ⅓ cup light brown sugar , packed
- ⅓ cup sugar
- 1 egg
- ½ teaspoon vanilla extract
- 1 ¼ cup flour
- ⅓ cup cocoa powder
- ½ teaspoon baking soda
- 1/4 teaspoon fine sea salt
For the icing & topping:
- ½ cup unsalted butter , softened
- 2 cups powdered sugar
- 1 teaspoon peppermint extract
- 1/8 teaspoon fine sea salt
- 2 drops green food coloring , optional
- ½ cup Andes mint chips or mini chocolate chips , optional
Instructions
For the cookies:
- Preheat the oven to 350ºF and line a baking sheet with parchment paper. Set aside.
- Whisk or soft together the flour, cocoa, baking soda, and salt in a medium bowl. Set aside.
- Using a stand mixer fitted with the paddle attachment or electric hand mixer, beat the butter and sugars until light and fluffy. Add the egg and vanilla, and continue beating until well combined.
- Stir in dry ingredients until completely incorporated, but do not overmix.
- Using a large spoon or 1-ounce cookie scoop, drop cookie dough onto the parchment lined baking sheet, leaving at least 2 inches between cookies. Gently flatten the dough ball using your palm or the bottom of a lightly floured glass.
- Bake for 10-12 minutes until cookies are set on the edges, but not browned.
- Remove from oven. Transfer to a wire rack after 5 minutes to cool completely.
For the icing:
- In the bowl of a stand mixer or a large mixing bowl using an electric hand mixer, beat together the butter, sugar, extract and salt until smooth. Add the food coloring, if desired.
- Fill a piping bag fitted with a #12 icing tip with icing.
- Ice cookies starting in the center, and working your way to the edges in a circular motion. Alternatively, you can simply ice with a spatula or butter knife.
- Sprinkle the cookies with Andes chips or mini chocolate chips while the icing is still tacky, gently patting down to stick.
- If you've tried this recipe, come back and let us know how it was in the comments or star ratings.
Video
Notes
Nutrition


These really do resemble a Crumbl copycat recipe. So yummy!
These were incredible! The perfect texture and so flavorful!
Oh yum! You can never go wrong with the chocolate and mint combo! 🙂 Definitely going to make these cookies soon.
You can’t go wrong with mint and chocolate! These were delicious!
These are incredible! I love andes and the cookie version is even better!
I adore Andes mints and these cookies were the best way to enjoy them! Perfectly chocolatey, soft and chewy!